Introduction
The appointments feature allows you to book times for meetings or other services with clients. As of right now, the appointments feature does not integrate with other scheduling platforms, but updates are pending. You have the option to organize and sort your appointments by categories you create, more information can be found about appointment categories here.
The appointments feature can be found in the left menu:

In This Article:
- Add a New Appointment
- Edit an Appointment
- View Today’s Appointments
- Delete an Appointment
- Manage Deleted Appointments
Add a New Appointment
Before adding your first appointment, you must create at least one appointment category. See the article on Appointment Categories to set categories up.
To create a new appointment, navigate to the Appointments main feature page.

Once the page opens, click the + New Appointment button in the top right.

This opens the New Appointment page where you can fill out all of the appointment details. Any field in red is a required field.
Appointment Start
Click inside the appointment start field to select the date and the time that the appointment is scheduled to begin. For more information on the calendar and time dropdown see documentation here.
Appointment End
By default, the program assumes an appointment will be finished on the same calendar date it started. Click the appointment end field to select the time that the appointment is expected to be finished. For more information on the time dropdown see documentation here.
Appointment for Person
Enter the name of the person who will be attending the appointment with your company.
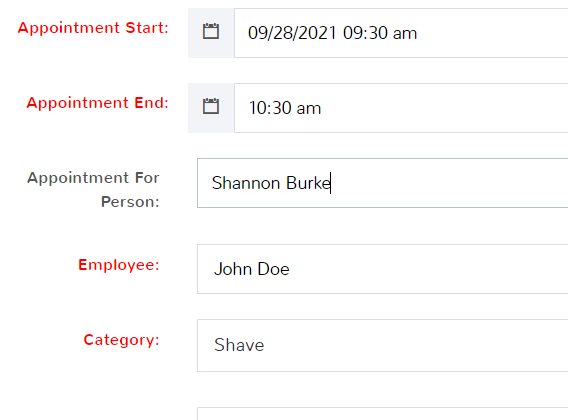

Employee
Click the dropdown and you can see all of your active store employees to choose from. You can also start to type an employee’s name and then select them from the dropdown.
Category
Click to see the dropdown of category options for your delivery. Before adding your first appointment, you must create at least one appointment category.
Notes
You can add any additional information that your employee may need to know about the appointment that has been set up.
Select Save in the bottom right in order to create the appointment.
Edit an Appointment
To edit appointment information, navigate to the Appointments main feature page.

Once the page opens, locate the appointment you need to edit the information for and select Edit.
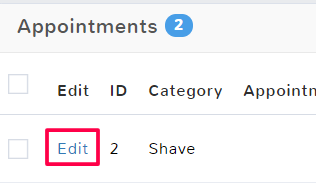
This will open the Update page. Here you can edit and adjust any necessary information for the appointment. Select Save in the bottom right in order to keep the changes made.
View Today’s Appointments
Often it’s helpful to know what appointments are on the books for the current day. To quickly see all appointments made for the day, navigate to the Appointments main feature page.

In the top right click the ellipses (…) to see more options and select Today’s Appointments.
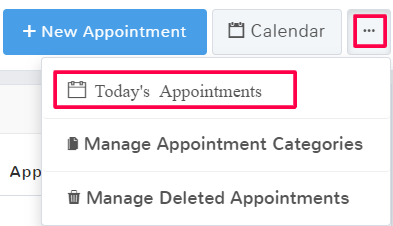
This will open up the Day option for the calendar views. You will be able to see each appointment scheduled for that day, the time it is scheduled for, the category, employee, and person the appointment has been made for.
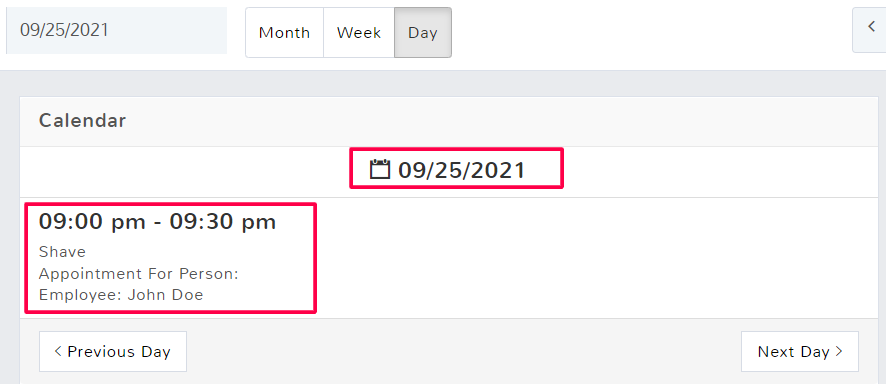
For more information on other calendar views and navigating them, see the article on the Appointment Calendar.
To return to the normal list view of appointments, click the left arrow in the top right of the page.

Delete an Appointment
To delete an appointment navigate to the Appointments main feature page.

Once the page opens, locate the appointments you want to delete and click the checkbox to select the row. You can select multiple rows if you want to delete more than one appointment at a time. Above the appointments list, there will be an option to Delete the appointment.
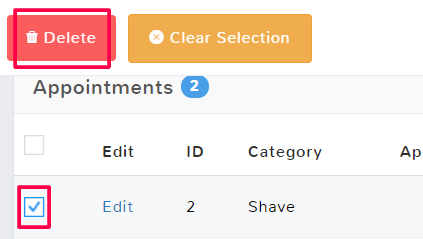
A popup will confirm you want to delete the information. Click OK to delete the appointment.
Manage Deleted Appointments
If you accidentally deleted the wrong appointment, you can undo the mistake so long as you have not selected to clean up old appointments. To undelete an appointment, navigate to the Appointments main feature page.

In the top right click the ellipses (…) to see more options and select Manage Deleted Appointments.
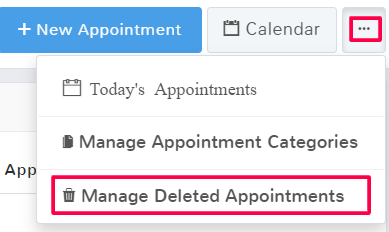
To undelete an appointment and remove it from the deleted section, click the checkbox to highlight the row. You can select multiple rows if you want to do more than one appointment at a time. A menu will populate above the list of deleted appointments, select Undelete.
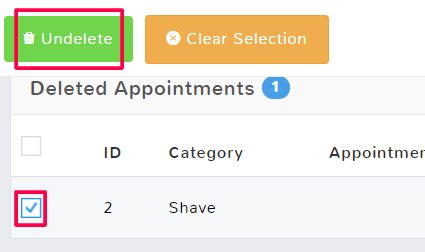
Click Done to return to the normal appointment feature page.

