In this article
Introduction
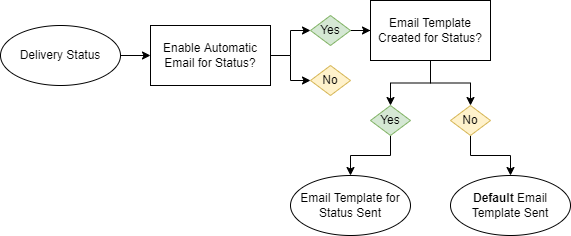
When the status of a delivery is updated in InventoryFlo POS, a notification email can be sent to the customer to keep them up to date on their order. Whether an email goes out with a status change depends on the options you selected when creating delivery statuses. More information can be found on delivery statuses here.
The information that a delivery notification email contains is entirely customizable. You can set up different messages for every status of a delivery or simply create a default message that is sent out.
Note that the email templates you set up will apply to all locations for your store.
In This Article:
Create a Delivery Template
To create and work with delivery email templates, navigate to the Deliveries main feature page.

In the top right click the ellipses (…) to see more options and select Manage Email Template.
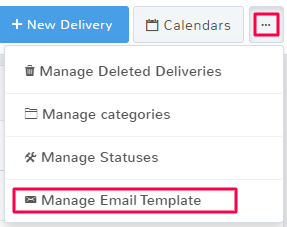
There are three main sections for delivery email templates, the status that the message will send for, the email template itself, and shortcodes to help you customize emails with customer information.
Select a Status
The first thing you have to select to make an email template is the Status that you want to create the message for. Locate the Status Section and click the dropdown to see all the options. When you select a status, it means the message you create will be sent when a delivery is updated to that status.

For more information on statuses and how to create and manage them, see the article here.
If you already have an email template for that status, you will see it in the Manage Email Template section. You can change and update the message by editing the section and selecting Save.
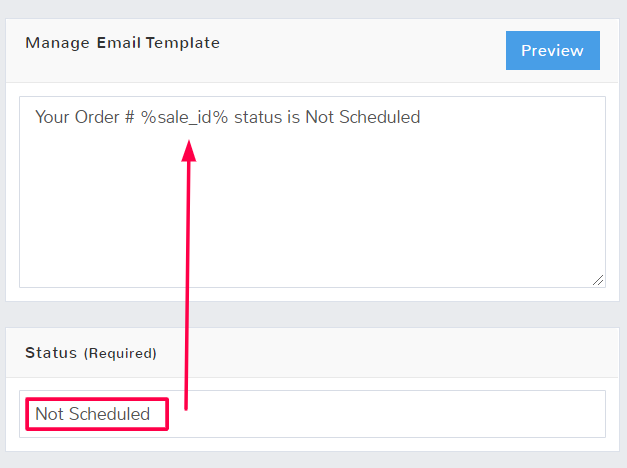
Note: When you select the status Default from the dropdown, it means that this is the message that will send if there is no other established email template. For example, you have set up your delivery statuses so that “Pending” is meant to send an automatic email, but you never created an email template for the “Pending” status. This means that whatever message you created for Default is going to send to the customer.
Create an Email Template
Once you have selected the status the template is for, you can fill in the email message you want to send in the Manage Email Template section.
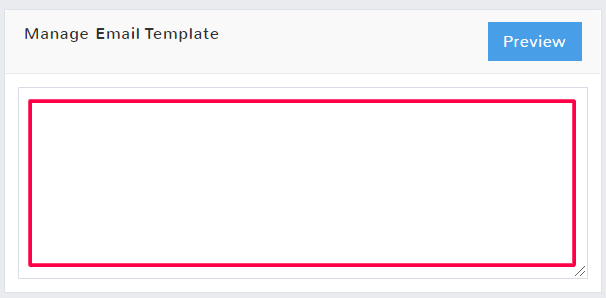
Anything you type in the section will become part of the email that sends to your customer. To make creating emails easier, Shortcodes are provided.
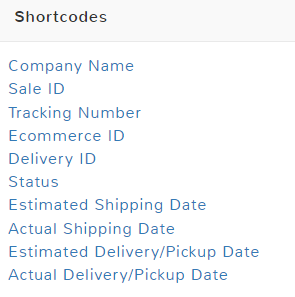
A shortcode allows you to put a placeholder in an email template for customer-specific information. For example, you may want to include the sales ID for delivery emails so that frequent customers know which order they are receiving a notification for. Using the shortcode of Sale ID will automatically fill in with that customer’s sale ID when the email is sent.
For example, if you wanted to create an email template that said:
Your Order #POS-34 has now Shipped. It should arrive by December 15th.
You would use the following shortcodes in your email template:
Your Order#Sale ID has now Shipped. It should arrive by Estimated Delivery/Pickup Date.
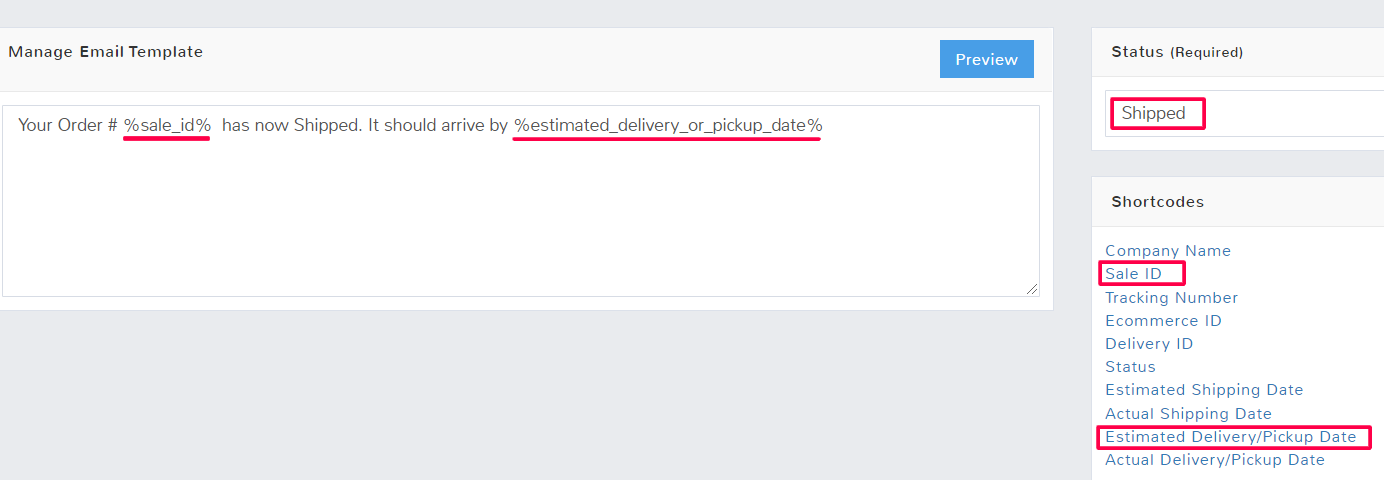
You can preview what a message looks like by clicking Preview in the top left of the Manage Email Template section.

Note: Use caution with shortcodes for tracking numbers, and dates as these are not fields automatically populated or updated in the system. Delivery information, such as tracking, estimated dates, and statuses need to be manually entered. If you never entered an estimated delivery or pick up date for a package but use the shortcode for that information on a default template, your customers are going to get a clunky email that looks something like below:


