Setting up InventoryFlo POS with Woocommerce
Installing WordPress AND WooCommerce
WooCommerce is a free plugin for the popular site creating tool WordPress. You first need to install wordpress and then install the Woocommerce plugin. NOTE: It is very important to always keep up to date with these 2 pieces of software for security and performance reasons.
Make sure WordPress and WooCommerce are up to date
It is very important to always keep up to date with wordpress and woocommerce for security and performance reasons.
Installing WordPress
You can follow the steps at:
Installing Woocommerce
You can follow the steps at WooCommerce’s web site
Configuring InventoryFlo POS To Connect to WooCommerce
Setting up InventoryFlo POS to communicate with WooCommerce is easy. It involves 2 steps.
- Generating API key in WooCommerce
- Copying API information into InventoryFlo POS
Generating API key in WooCommerce
See the WooCommerce Documentation on generating an API key for the REST API.
Copying API information into InventoryFlo POS
In the last step you generated your API keys for WooCommerce; now you need to put this information into InventoryFlo POS. Here are the steps.
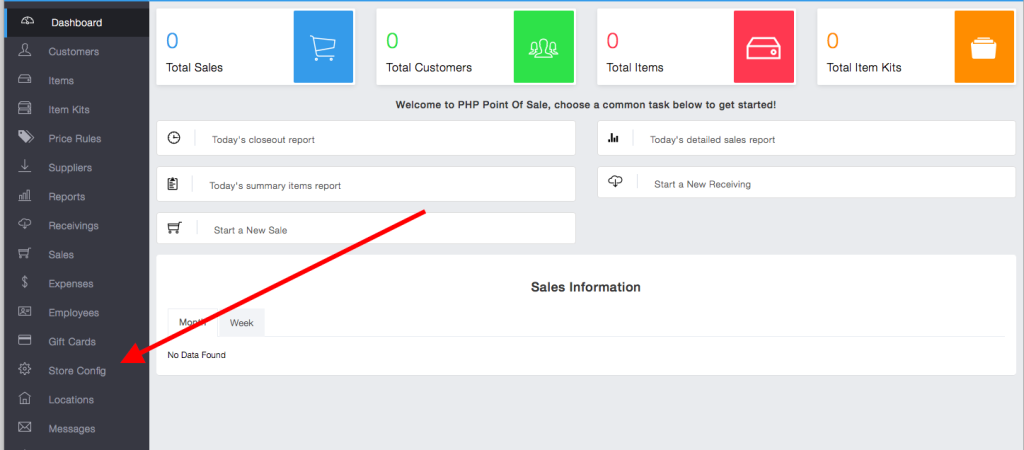
- Login to your point of sale system and choose store config on the left navigation
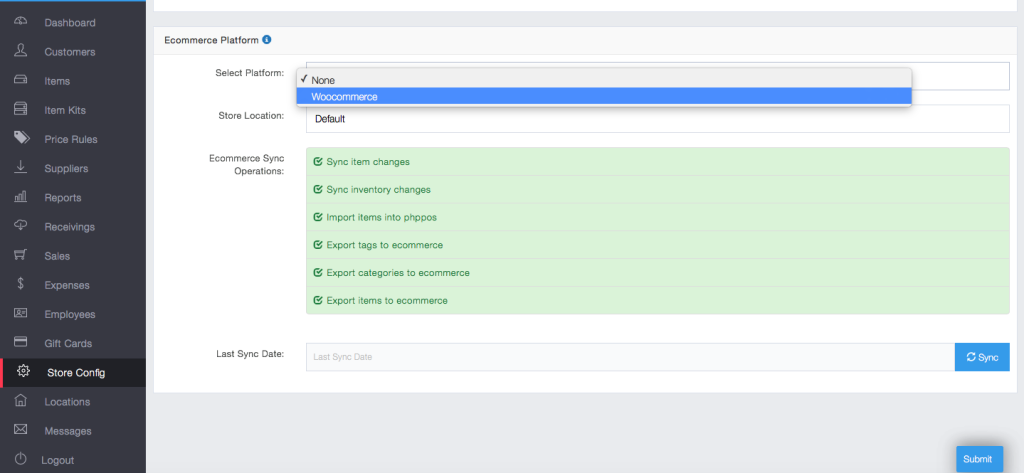
- Search for “Ecommerce” and choose WooCommerce as e-commerce platform under the e-commerce setting.
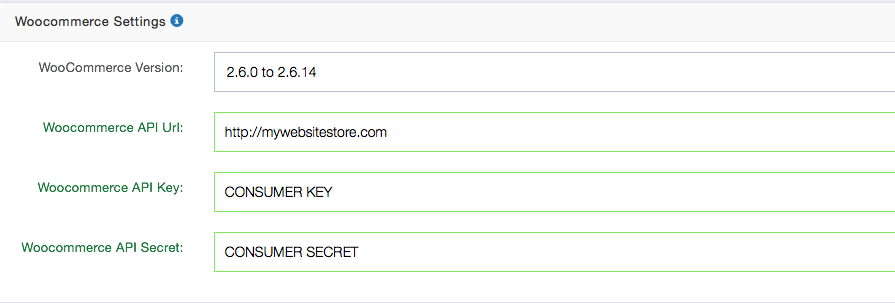
- In the Woocommerce section that appears put in your WooCommerce Version; the URL to your store and the Consumer Key and Consumer Secret as shown in image below
- You have now completed setup.
Syncing Data
We have made the process of syncing data a one button operation. You can simply choose what you want to synchronize and our program will take care of it. You can import and/or export items, categories, tags, or just sync inventory data. This can be accomplished from store configuration as shown below by choosing your options and clicking sync.
NOTE: This process can take a LONG time; especially for the initial sync depending on how much data you have.
By default it synchronizes all items, categories, and tags. NOTE: You can exclude items by unchecking the box “Is Ecommerce Item” when editing/creating an item.

Setting up Automatic Synchronization via cron task
Woocommerce syncing can be setup to happen automatically via a cron task in InventoryFlo POS.
If you are using the popular cpanel software from your web site; you can read about setting up a cron task at their documentation website.
If you have command line access to your linux server; read more about cron tasks at:
https://help.ubuntu.com/community/CronHowto
If you are a cloud customer please contact us to get this setup.
We recommend setting the task to run every 15 minutes. We don’t recommend doing a shorter interval for performance reasons.
To path to the script varies per server and where you installed it; but if you installed it in /home/public_html/pos the path to the script in the cron task for every 15 minutes would look like
*/15 * * * * php /home/public_html/inventoryflo/index.php ecommerce cron http://inventoryflourl/Information About Sync Matching
Our sync process will try to match woo commerce’s sku field to InventoryFlo POS’s UPC/EAN/ISBN field (item number)
Automatic Syncing in windows
- Make the following “ecom.bat” file and place it on your desktop or someplace you can find later.
C:\INVENTORYFLO\php\php.exe C:\INVENTORYFLO\apps\INVENTORYFLO\htdocs\index.php ecommerce cron http://localhost/Example:
- Search for “Task Scheduler”
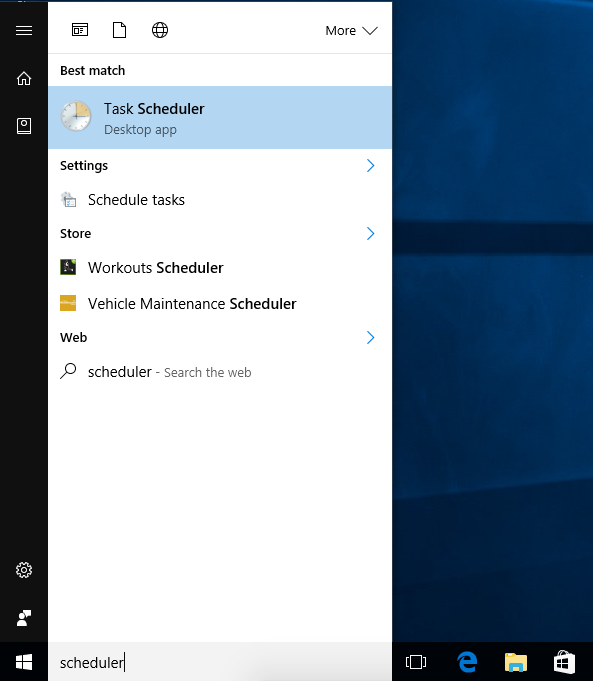
Task Scheduler
- Open “Task Schedule” desktop app
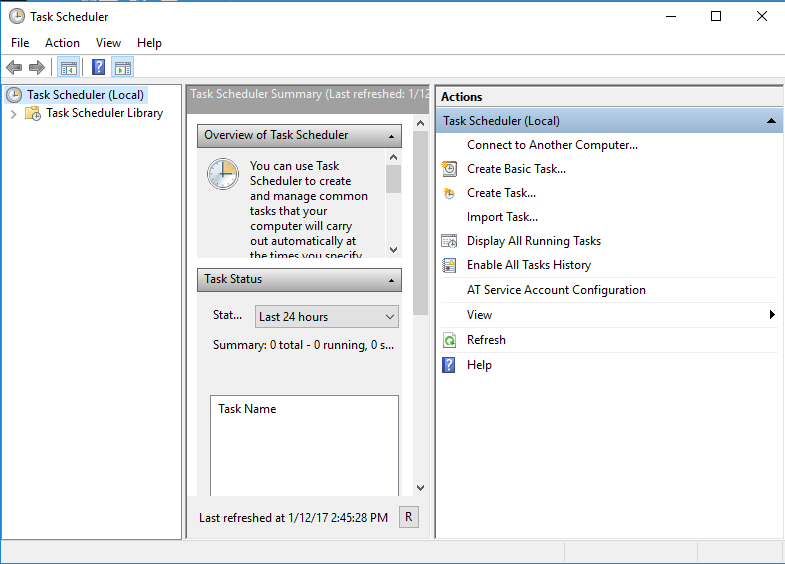
- under “actions” click “create basic task”
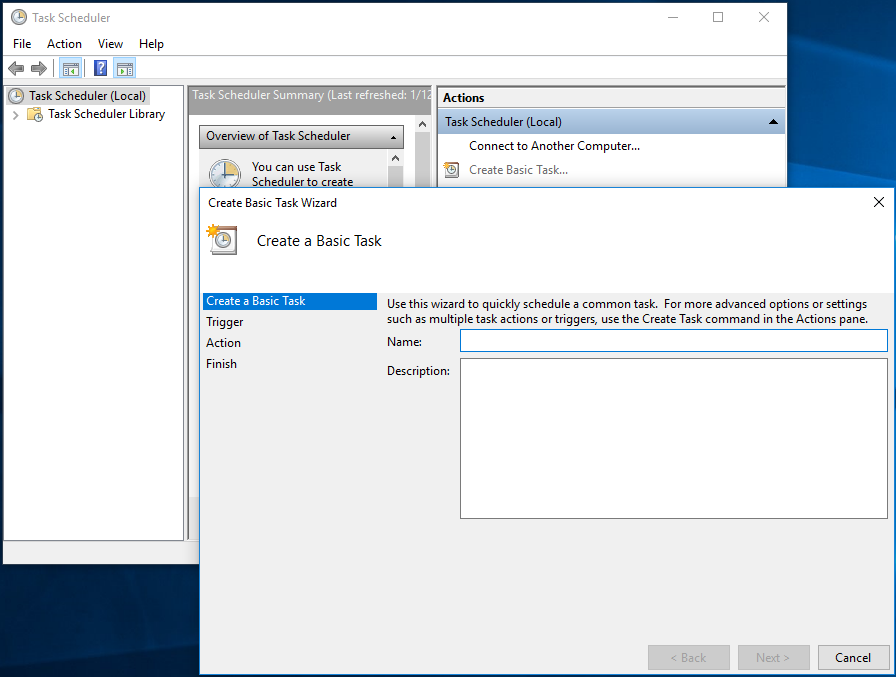
under “actions” click “create basic task”
- Label the task and click next
- Enter the frequency you want the backup run and click next
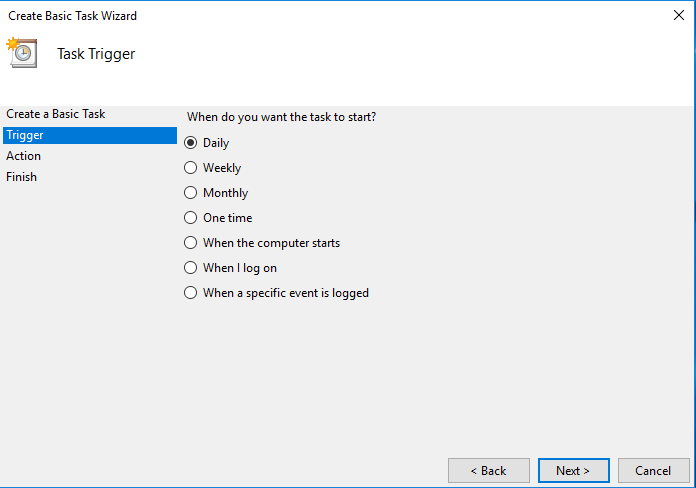
- Enter the time of day and click next
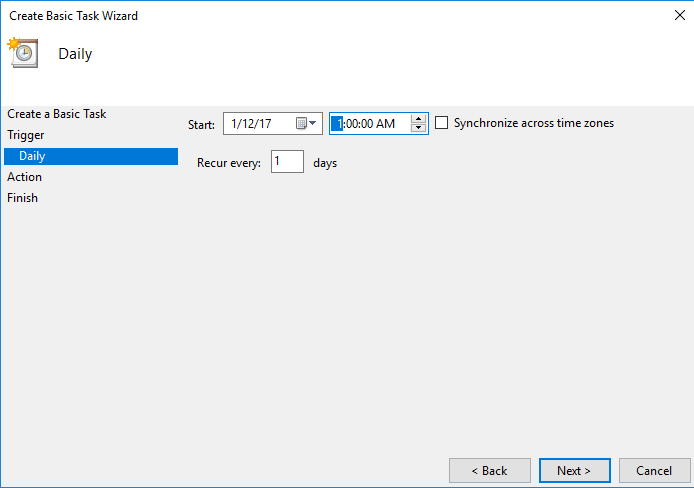
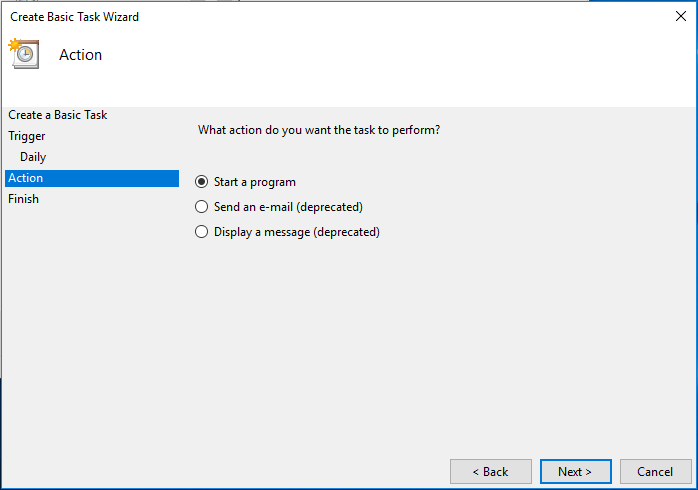
- Select Start a program and click next
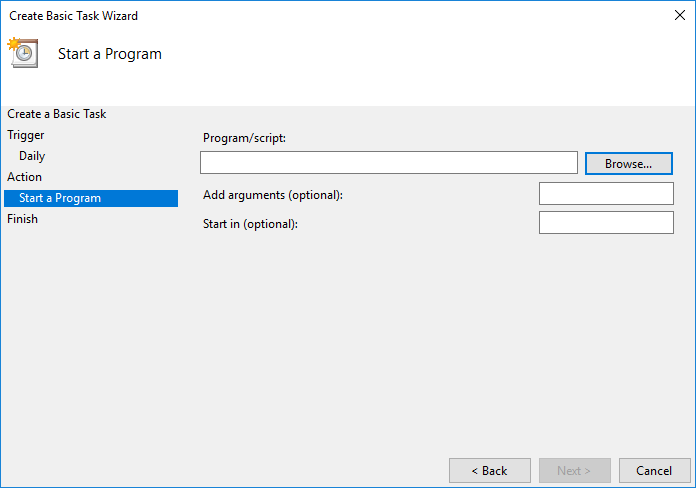
- Find the .bat file we created in step 1 and click next
- Cron sync will now run! you can now view this scheduled task and modify it from the task scheduler.

